Saturday, December 27, 2008

Camera Lens


Once you've settled on the subject and the light, you have to decide on the relative prominence of objects in the scene. By moving the camera position back and forth, you can adjust the relative size of objects in the scene. After you're happy with the position, you pick a camera lens whose angle of view encompasses all the objects that you want to include in the photo.

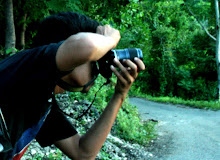
Objects? Relative prominence? I only want to take a picture of my friend Cyrano! There is only one object in the scene and it is Cyrano's head.

Au contraire! The objects in this scene are Cyrano's nose, Cyrano's ears, and Cyrano's eyes. Suppose that you position your camera 10" from Cyrano's eyes. If his nose sticks out 5" in front of his eyes, then it will be only half the distance from the camera as the eyes and therefore relatively more prominent. Stretch out your arm right now and compare the size of your index finger to the lines of text on the monitor. Only about as big as a paragraph, right? Now close your left eye and bring that same finger in until it is just in front of your nose. Note that your finger appears taller than the entire monitor.


Aesthetic tip from MIT: when your nose sticks out 5" in front of your eyes, you don't want it to appear relatively more prominent.

Suppose that you actually want this photo as the "before" illustration in a plastic surgeon's advertisement. Well, then haul out the 24mm wide angle lens and you can have a complete portrait taken from 10" away.

Suppose that you wish to flatter Cyrano. You'll want to back up until you are separated by the length of a football field. Now his nose is still 5" closer to the camera but that is 5" out of 100 yards (note for European readers: 100 yards is just short of half a standard furlong.) So instead of being 50% of the distance to the camera as Cyrano's eyes, the nose is 99.86% of the distance away. It will not be significantly more prominent.

What about the 24mm lens from this camera position? It will give you a nice photo of the entire stadium and the city behind it. Cyrano's face will appear as a portion of a grain of silver on the film. You're now 100 yards away from Cyrano so you will need the Mother of All Telephoto Camera Lenses. In fact, according to the formulas in my Kodak Professional Photoguide, if Cyrano's face is 12" high, you will need a 7500mm lens to fill the frame with it. Cyrano will be flattered but considering that a Canon 600mm lens costs almost $10,000, the effect on your wallet will not be a happy one.

Exactly how long a camera lens do you need?

Wednesday, December 24, 2008

How to Use a Digital Camera as an External Light Meter

Why buy a separate meter when you can buy a complete camera with a built in meter for less than a separate professional meter? Yes, for the same price or less as a pro meter you can buy a digital point-and-shoot that weighs less and lets you preview the images for color and contrast.

As of October 2004 I no longer use my Pentax Spotmeter. Instead I look at the LCD screen of my Nikon D70 and copy that exposure for use with my film camera, presuming the LCD image looks as I want it. This is better than any meter; it shows me the effects of lighting and color temperatures and simulates my chromes on a light table.

Watch for these issues:

1.) Overall camera calibration. My Nikon D70 is right on, and my Canon A70 is one stop more sensitive than rated. That means that my A70 set to ISO 50 is really at ISO100, so for Velvia I have to add a stop to what the A70 at ISO 50 says. Make a few shots at various ISO variations to see which one matches your film.

2.) Filter factors. Put the same filter over the lens of the digital camera. If you have different or no filters on one camera then be sure to apply the differences in filter factors.

3.) Light Transmission. Not all lenses transmit all of the light, so you may also have to take "lens factors" into account as well as any aperture calibration variations in lenses. Zoom lenses, especially older ones, may lose as much as 2/3 of a stop compared to fixed lenses due to light lost as internal reflections. This is never a problem with TTL SLRs because TTL metering automatically corrects, however it will alter the reading if you are trying to use the reading from one camera on another.

4.) Differing ISOs. It's unlikely that your preferred digital ISO setting will just happen to match your preferred film. You'll be shooting photos with your digicam and not just using it as a meter. It is cumbersome to keep swapping ISOs between what matches your film and where you prefer to shoot the digicam. If you swap ISOs you are likely to forget and use the wrong setting and waste film. I suggest leaving the ISO of the digicam where you prefer and calculating exposure conversions in your head or use the calculator dial on a light meter. You even can use a broken old meter for this. I use the scales on my Pentax meters. Here's how:

4a.) Set the digicam's effective ISO on the Pentax meter. You figured out the effective ISO from tests in 1.) above, which may or may not be the ISO indicated on the digicam.

4b.) Set the indicated exposure from the digicam on the Pentax scale. Don't move the ISO setting.

4c.) Reset the ISO on the Pentax meter to your film's ISO. Don't move the LV ring. Now read the film exposure off the Pentax scale

Tuesday, December 23, 2008

Scanning Photos onto Computers

While scanning pictures onto a computer sounds complicated to beginners, the procedure isn’t really that difficult. Learning to use a scanner is essential if you want to preserve old photos, copy prints or archive photos.

Reasons for Scanning Pictures
Scanning photos is useful for a number of reasons. Perhaps the most important is creating a digital copy of your existing pictures.

A digital archive of pictures can be copied, transferred to an external storage device or CD, or used to create an online photo album. Digital photos also ensure that copies of photos are available if the originals are destroyed.

Scanning photos also allows you to edit existing photos with imaging software, such as Adobe Photoshop. Picture flaws such as red eye, contrast and lighting can be fixed by scanning images into computers. Changing a color photo into grayscale (black and white) or sepia tones is easily done by editing software, as well.

A Guide to Scanning Images
Many different scanners are available, including stand-alone scanners and printer/scanner combinations. Each scanner on the market is packaged with its own software for scanning images that you must install on your computer when you set up your scanner.

Despite the wide variety of scanner options, each scanner works in essentially the same way: Once you position the photo onto the glass plate of the scanner, you simply open the scanner software and follow the directions.

Most, if not all, scanners will show you a preview of the photo you want to scan. Before scanning photos, however, you have to make a few decisions about picture quality and image file types.

Scanner Resolution
Scanner resolution determines the image quality of the scanner photo. When scanning images, resolution is measured in dpi, or dots per inch.

While smaller dpi settings will result in less picture resolution (not as highly defined), they do create small files with correspondingly small pictures, saving space on your hard drive. Lower dpi settings are good for photos that you will display online or send by e-mail.

Here’s a list of standard dpi settings that people use when scanning photos:

* 72 to 100 dpi : Although these settings provide lower quality resolution when scanning photos, they produce much smaller files when the image is scanned at 100 percent. Seventy-two to 100 dpi scans can be e-mailed without causing extremely long download times.
* 300 dpi : Use this dpi setting to maintain the quality of a four-inch-by-six-inch or five-inch-by-seven-inch photo that you are going to view or print at the same size of the original photo.
* 600 to 1,000 dpi : A high dpi setting will produce extremely large files that take up a lot of memory. These large files are best used for scanning pictures with high sentimental value or older heirloom pictures in which you want to produce the sharpest image possible. In both cases, you may want the highest degree of quality. People also use high dpi settings if they want to enlarge images without sacrificing quality.

Scanning Images: File Formats
A scanner usually scans images when the user clicks the “Save” button or selects “Save” through the scanner software menus.

However, before scanning images, users need to determine what type of file form they will use to save the images.

Here are the most common file formats for scanning pictures:

* Bitmaps (.bmp) are large files that produce high-quality images.
* Jpegs or Jpgs (.jpgs) compress files but lose some quality due to compression techniques.
* Tiff files (.tiff) produce very detailed but very large files.
* Giff files (.giff) are small, compressed files that are ideal for website use and for e-mailing scanned images.

The results of scanning photos will differ widely depending on which file formats and dpi resolution you select. Experimenting with a scanner while scanning pictures helps to give you some idea of which file formats and resolutions work best for individual pictures.